Project: Civilian Marksmanship Competition Rifle
Soon I will have accumulated another 80% Rifle upper and lower receiver that I will have custom laser engraved for this new project and I will feature the whole build process. This rifle will be built to the CMP 2020 -2021 Rule book which you can find on page links to the right side of this blog under pages of interest or you can click this link:
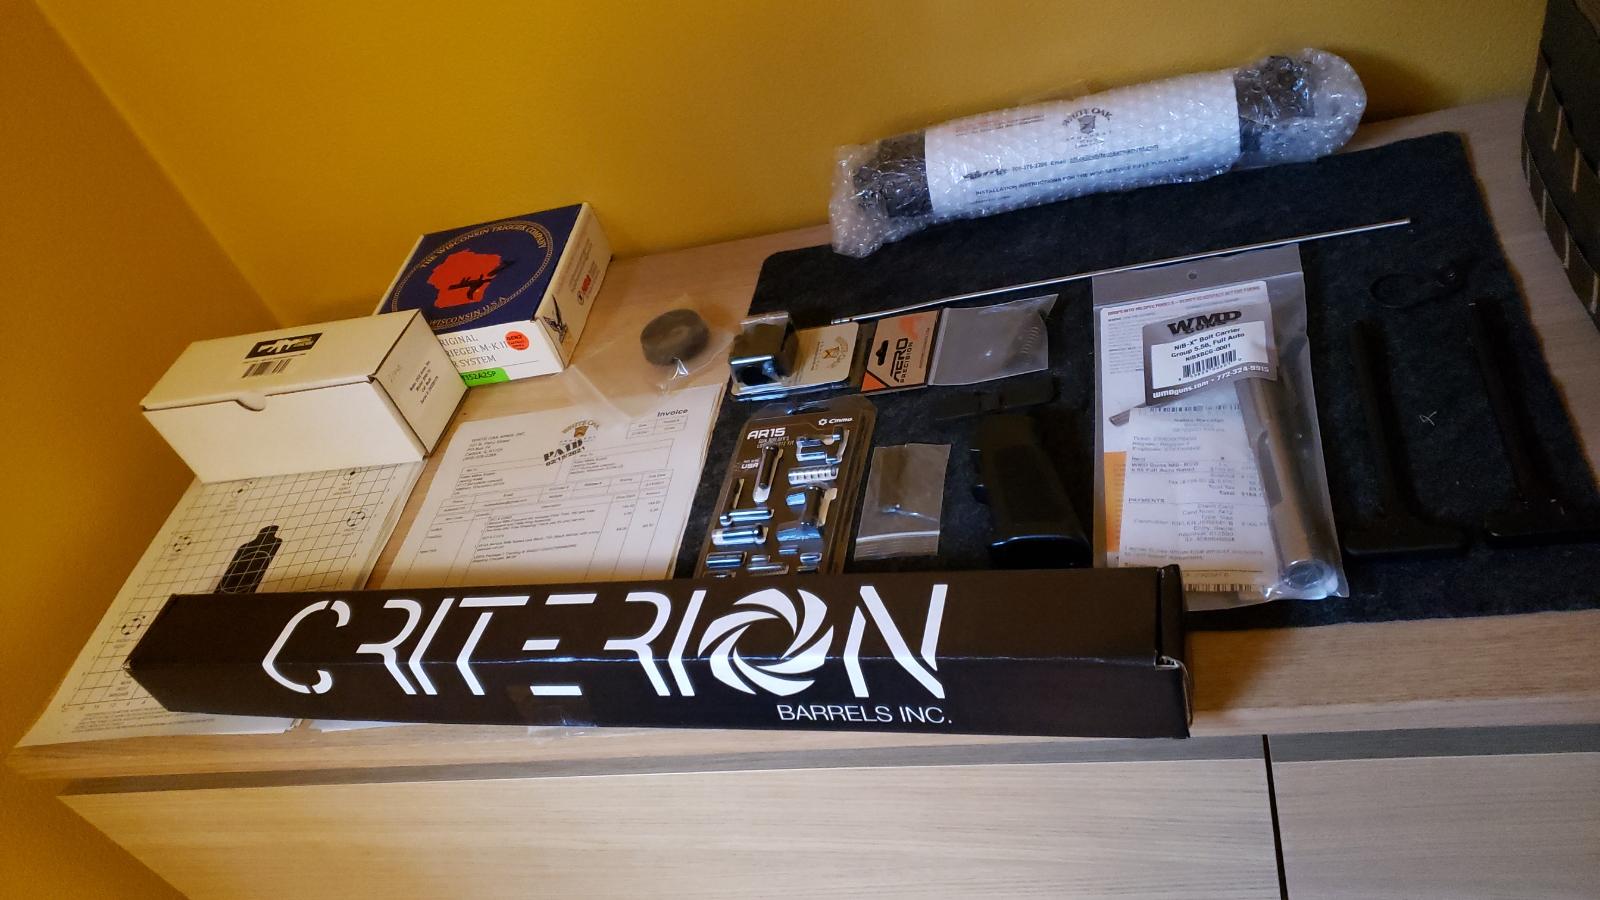
I have slowly been accumulating the parts as I am trying to acquire as many parts as I can from the State of Wisconsin since that is where I am based out of and I am trying to support local businesses during these trying times. Stay tuned
Criterion Barrel Made in Wisconsin .223 Wylde Chamber designed to shoot .223 and 5.56 but designed with tighter tolerances for precision shooting.
Wisconsin Trigger Company Made in Wisconsin
While I have my Bolt Carrier and Barrel now I might as will check the chamber with my go and no - go headspace Gauges I picked up from
https://www.brownells.com/
To do this check with a new barrel not installed you'll take apart your bolt carrier group because you'll be using just the bolt and the chamber checkers.
First, you'll drop in the go headspace gauge into the chamber. You'll insert the go gauge and see if the bolt will go in and lock lugs.
It locked woo hoo.
if it doesn't lock on the NO - GO the headspace is within specifications.
This barrel is 100% within spec. It would not lock on the no-go gauge.
If you ever have a bolt that does lock on the no-go gauge. First, check another bolt if the issue is still present you have to immediately contact the manufacturer or take it to a gunsmith before use as the headspace is out of spec and it is too dangerous to use till the issue is corrected.
IMPORTANT SAFETY NOTE: Headspace issues can lead to damage to a firearm, bodily damage, or even death to the person operating the firearm.
Project: Civilian Marksmanship Competition Rifle day 2
Planning on what works and what doesn't for engravings. Print out what you want to be engraved by printing, cutting, and placing on the receiver. Trial and error to see what fits and where.
If you're looking for ATF guidelines on engraving depths you can refer to them here:
https://www.atf.gov/firearms/firearms-guides-importation-verification-firearms-ammunition-firearms-verification-overview
Test things out, look at another receiver if you have one lying around.
NOTE: Be aware of where you're going to have holes drilled as shown here. As you can see this will not work in this location. Alteration required.
This will work. I chose a different quote and see how I spread the wording out to avoid drill locations.
Here is an example of what I provide to the laser egraver along with .svg image files.
Assembling the upper receiver
lightly oil before assembly
When assembling you will need to push the button in while driving the forward assist retaining roll pin in.
Note: Use the proper punch set for this. there are specific roll pin punches made to not destroy the roll pin. Cabela's has a very nice Herter's brand name set I use. Also, tape off the area in case you slip off of the pin to avoid damaging the finish.
Dust cover installation. This will be a little tricky, but doable for anyone. No tool really acquired for this task with everything apart. You must need to manipulate the spring while feeding the rod through

Notice C-clip orientation. it is on the forward side. Make sure that you have the rod all the way back so that it will not be touched by the barrel nut or any other part. On a precision rifle tolerances are everything, so make sure everything is oriented and placed where it needs to be. The goal is no gaps anywhere they shouldn't be. Every component plays a role in the bullets performance down range.
soon we will cover barrel seating and more assembly.
Project: CMP Competition Rifle Build (Continued)
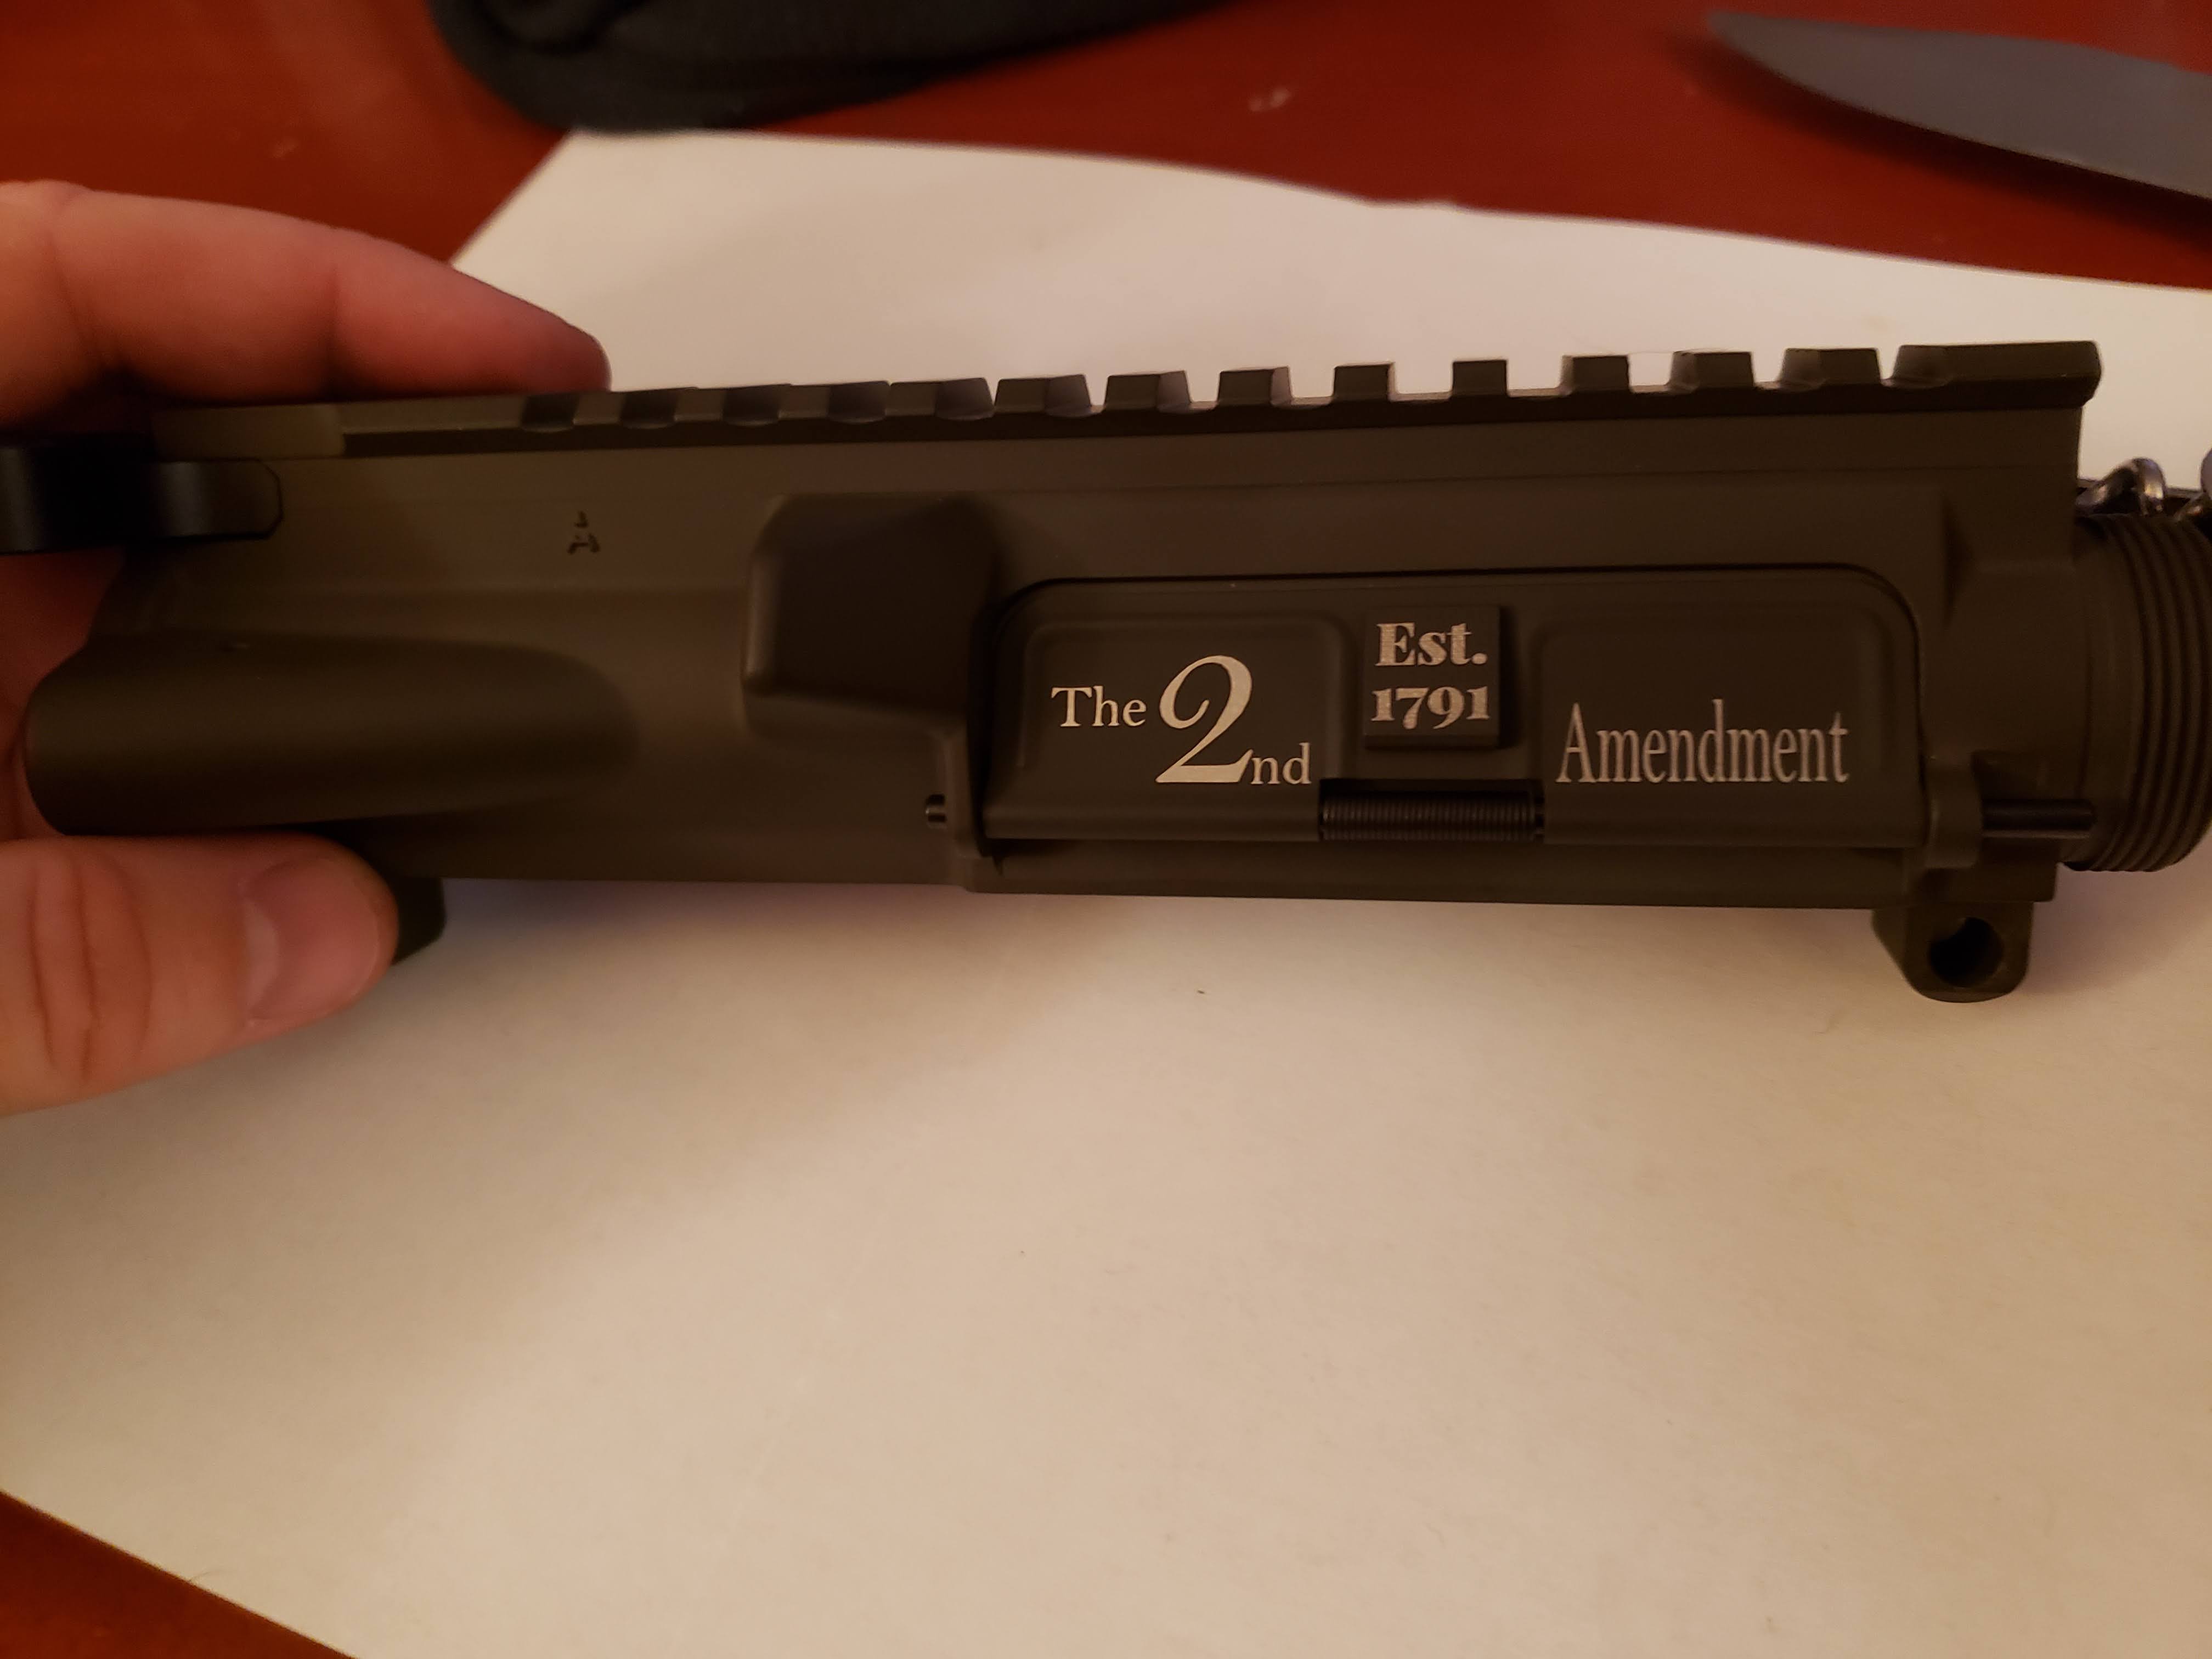
Laser Engraving the custom logo and marking on the lower receiver.
The Engraver will take the information and image data you provided and enter it into their software for the laser.
Here we are trying to calculate and coordinate laser engraving placement.
The Engraving machine is actually creating a box of where the laser will burn images or lettering. This will help you place the receiver and get it aligned before the engraving run.
This is a timely process it can take over 1 hr just for this. Oh, there goes Joe Biden's 30 min kit build theory.
If you want the ability to actually report your firearm stolen it's always wise to have it laser engraved.
I would like to point out these videos below are only a short portion of the time the engraving process actually took. I wanted to spare you the hours of repeating steps. The program repeats the image cuts many many times to get the depth we need for inlay work.
The laser engravings were done at Three Goats Firearms Click the image and check them out. Let them know we sent you!
Project: Project: Civilian Marksmanship Competition Rifle Build Day 3(Continued)
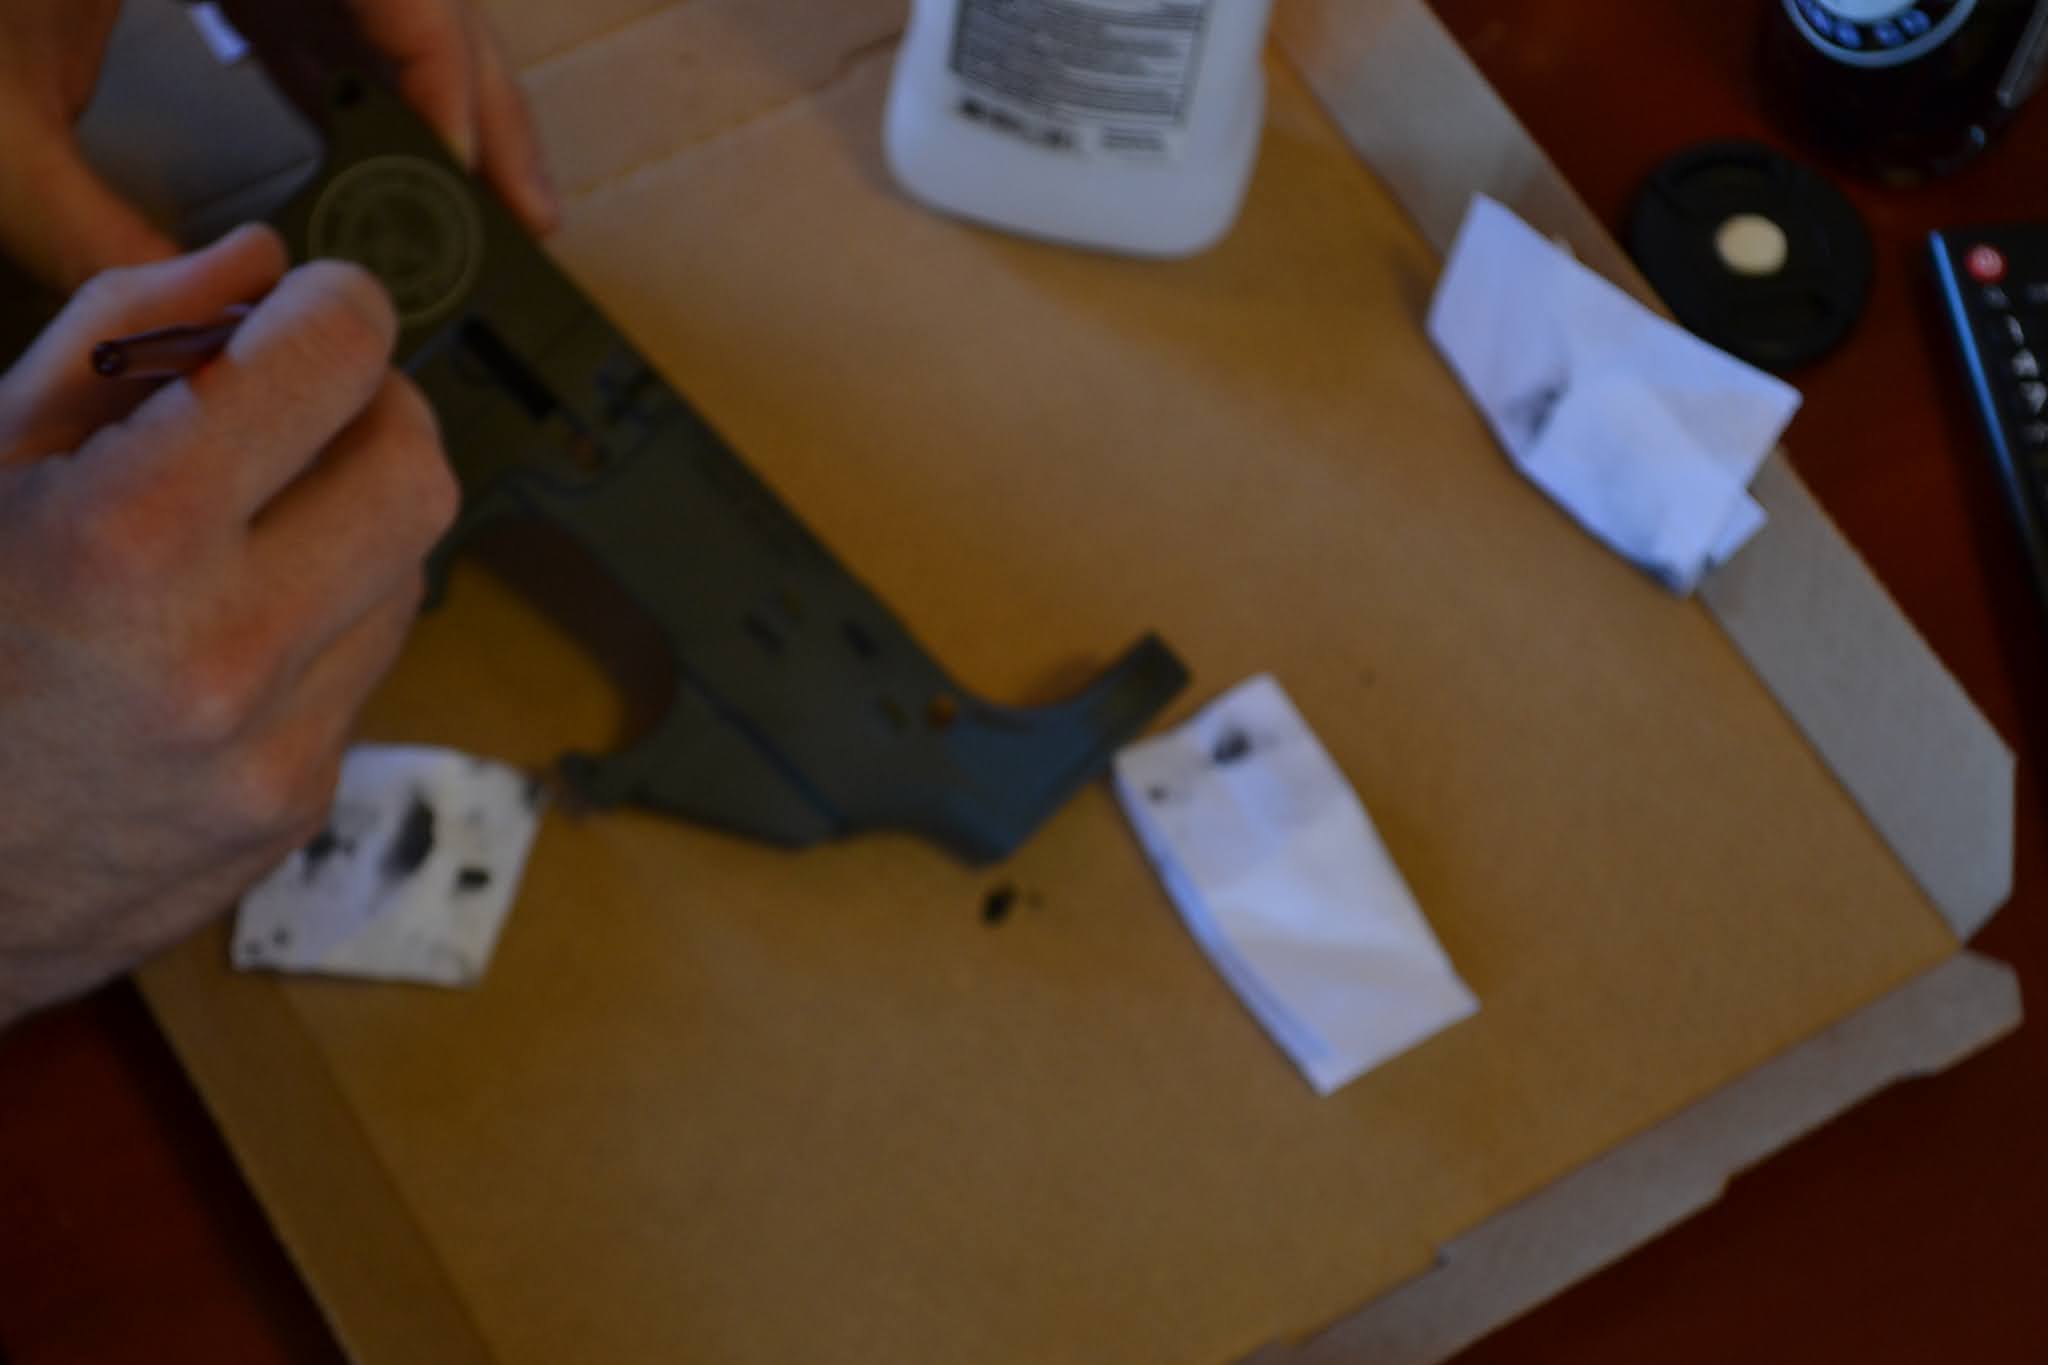
Inlay work. After Engraving. I add black paint to make things more detailed and visible. I will be using black as I did on my previous 300 Blackout Project.
Now when you start with this be sure to have water standing by Rubbing alcohol. I would recommend 90% alcohol over 70% it's better to use when swiping and cleaning the excess off. Use cue tips as well for edges and harder spots.
at this point just let it set up and dry. Pending on the paint you can also choose to bake it.
NOTE: If you are heating it be sure to use an oven you don't plan on using for food.
Project: Project: Civilian Marksmanship Competition Rifle Build Day 4(Continued)
Upper receiver build. After getting my Criterion barrel back from Cerakoting I decided that this would be a good time to polish the feed ramp and smooth things out for better performance.
User a Dremel and some polishing compound with the cone-shaped buffing attachment this process is fairly simple. The goal is to get rid of the machining and smoothing things to polish. Do not try to change angles we are just trying to remove rough spots.
Note: It's a good idea to plug the chamber with a cleaning patch or paper towel. to limit chances of compound going down the barrel. Also, after completely clean the barrel and chamber thoroughly.
I used the white and green compound start with the green then finished with the white compound. I bought these giant bars from a truck stop.
Polishing the ramps is very simple, you just need to take your time.
Project: Civilian Marksmanship Competition Rifle Build(continued) Day5
Barrel Installation
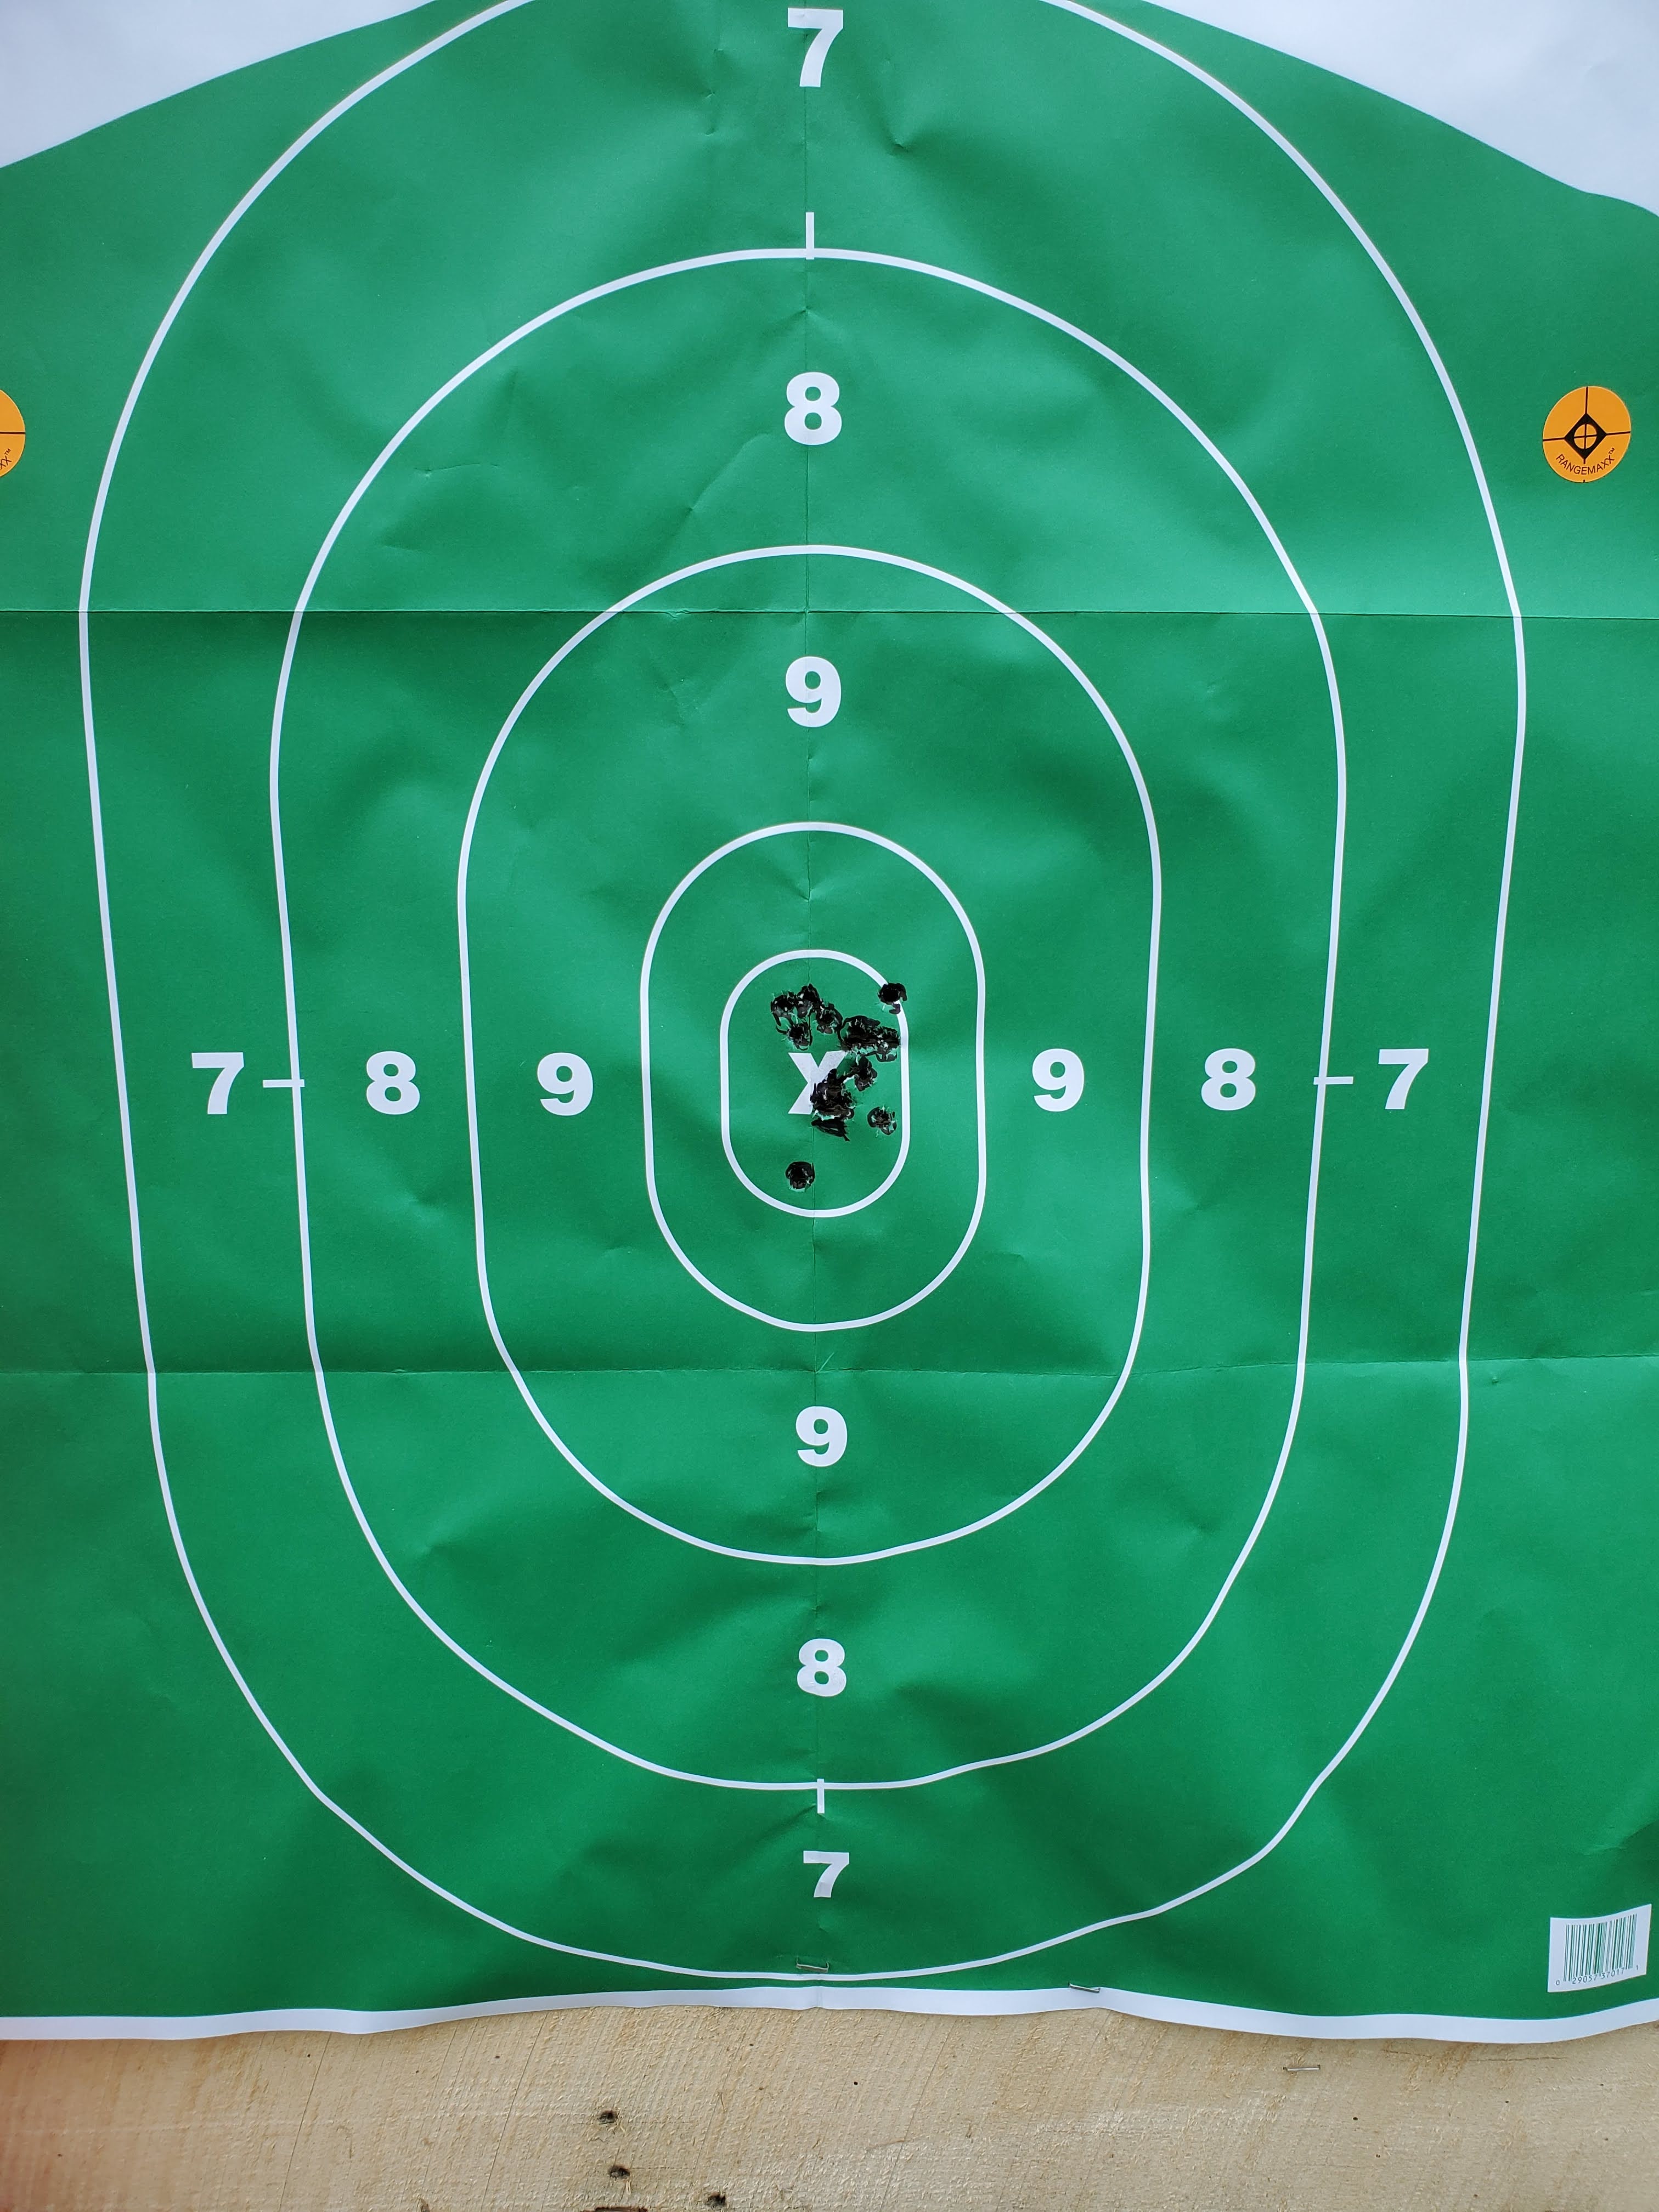
To get the best accuracy you need to true the face of the receiver and get rid of any play between the barrel and the upper receiver. Any bit of play will show up on the target downrange.
To true the receiver face you will need some tools and pending on how tight your lapping tool and how much coating is on your receiver you may need to use a drill.
Lapping tool I bought from Brownell's
Below is the lapping compound I used its just
You will spin it back and forth to true the face of the receiver to make everything even.
The next step is trying to get rid of any play and gaps between the barrel and upper receiver. Any play will show up downrange when shooting. The goal is to eliminate any play to reduce barrel whip.
This process will take some trial and error. We are looking for the tightest fit possible.
Currently, I am using this stainless shim stock. Use a scissor to cut to size.
After you have found the perfect fitment next step is to install the barrel nut.
This barrel nut and free float tube is specially designed to free-float forend, but keep the appearance of a stock M16 or AR15 foregrip.
Use a little grease or anti-seize compound on the receiver threads and install the new
barrel nut. Tighten to 35 foot pounds, then continue tightening until the next notch lines up
with the gas tube hole in the upper. If you feel that you can not reach the next notch without
using excessive torque, sometimes backing off and retightening the nut several times will
allow you to get a little more rotation on it. You can use the new gas tube as an alignment
tool. With the end of the gas tube through the hole in the delta ring, and the upper receiver,
you should be able to place the other end of the gas tube directly over the gas port hole in
the barrel without putting any stress on the gas tube. Once you have the barrel nut tightened
to your satisfaction install the lock ring and screw it all the way onto the barrel nut.
After your torqued you'll want to align the spring and c-clip so that the gas tube can fit through. Take care not to scratch your finish. Apply tape if you must.
Screw the float tube onto the barrel nut. You want to screw the tube far enough onto the
nut that when the front sight is installed you have clearance between the end of the tube and
the front sight base. Keep in mind that if you have a GI contour barrel, the front sight will be
about .035 away from the shoulder when you install the pins due to the fact that we no
longer have the handguard cap sandwiched between the shoulder and front sight. Keep this
in mind when you slide the front sight on to check your clearance. If you have a WOP or
WOA barrel, they were contoured with a float tube in mind and you will want to slide the front
sight all the way against the shoulder.


Tighten float tube. Once you have determined where the float tube needs to be, unscrew
the lock ring until it touches the float tube, but do not tighten. Now, leave the lock ring where
it is and unscrew the float tube. Put a small amount of removable Loctite on the end of the
barrel nut threads. Now, screw the float tube back on the nut. As you screw it on the Loctite
will be distributed on the threads. The reason we did it this way was that we do not want any
Loctite on the lock ring. You will understand why when it is time to rebarrel. After you have
the tube screwed back on to your predetermined position, back it off about 20 degrees and
hand tighten the lock ring against the tube. Now, using a strap wrench tighten the tube
against the lock ring until it is level. You can determine the correct position by sighting along
the top of the rifle and through the notch in the end cap for the gas tube. This notch should
be in line with the gas port hole in the barrel. You can also check it by making sure the sling
swivel lug is level.
NOTE: If you think there is even the slightest possibility of scratching what you're working on wrap it with tape.
A trick to get everything lined up easier is to put it upside down then torque the gas block.
The gas block I am using is from White Oak Armament.
Can be found here:
Torque Spec: 30 inch lbs
Installing the crunch washer and flash hider you want to align the vents upward evenly. These are designed to break up flash but also prevent dirt and dust from kicking up, so it vents upward.
Field testing of the built CMP Competition Rifle


No comments:
Post a Comment