KMS-PR-MK1 AR10 Lower Assembly
For Trigger Assembly review this video from Brownell's Inc.


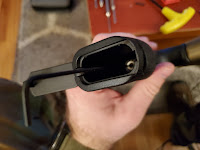
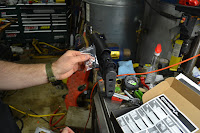
This is a little different from your AR15 as the takedown pin and the safety pin springs are all head in by the handle.


Once you get the spring pin and spring installed. This receiver is designed to have a threaded retainer pin put in instead of a roll pin for the bolt catch release button. I applied blue Loctite to this as a preventative to keep it from backing out over time.


1/16th in Allen is used here


For the grip mounting bolt. I swapped and add the NicTaylor00 Trigger kit.
The handle mounting bolt is threaded down the middle to allow tunability and take out all slop in the trigger.


Carefully feed pins and springs then gently push on the grip trying to take care in not bending over the springs and damaging them.


Now for adjusting this, use the Allen that was provided with the kit and screw inward while testing the safety function. This will push up on the trigger and take out the slop, however, take care when adjusting. If your safety no longer engages you have adjusted too far and you need to back the center screw back out.


This is an Anderson Stainless Steel Enhanced trigger. It's very smooth and my first time dealing with one. It installs the same way a standard mil-spec trigger installs.


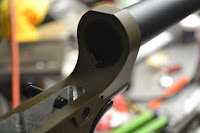
Now I didn't capture the mag catch installation, but you can refer to this link here that has great details on it.
The receiver here was a bit of a struggle due to the machining being different from than standard AR Platform. So I had to leave the button threaded out a little further. than most for good positive release of the mag.
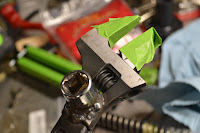
Further assembly. I will make mention of ProMag's AR10 Vice block which is advertised for AR10, SR-25, and DPMS receivers
A quick mention of problems I had with my new vice block and how I rectified the issue.
I bought this at MidwayUSA.com It was very cheap in Comparison to Real Avid, however, you get what you pay for. Real Avid Vice blocks are adjustable and are engineered superior in my opinion, but they are expensive.
When torquing on things in your vice you want to have that item snug and secure.
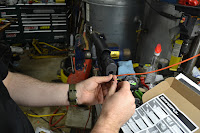
Now that this is figured out I will be installing buffer tube and torqueing 38-40 ft-lbs as well as installing Magpul PRS GEN3 STOCK


We also need to install the buffer retention pin and string.


This is one of the homemade tools I made during one of my other builds

Make sure to apply some grease to the threads of the buffer tube before torquing

The PRS GEN 3 stock seems to come out of the box ready to use the M4 buffer tube and castle nut.
We are using the A2 buffer tube and spring assembly, so we will have to convert the stock with the provided adapter piece.


Here is the provided mount screw with a thread locker already on it from the factory. I also torque this screw to 20-inch lbs


Side screws are also 20-inch lbs.

WARNING DON'T SHOW OR UPLOAD YOUR SERIAL NUMBERS UP TO THE INTERNET. THEY ARE BUILDING DATABASES AND ASSOCIATING THOSE SERIAL NUMBERS.


If your looking for Military Technical Manual you can refer to here:
*ARMY TM 9-1005-319-23&P
AIR FORCE TO 11W3-5-5-42
NAVY SW370-BU-MMI-010


No comments:
Post a Comment